
This post contains affiliate links. If you make a purchase from one of the links, we may earn a commission at no extra cost to you.
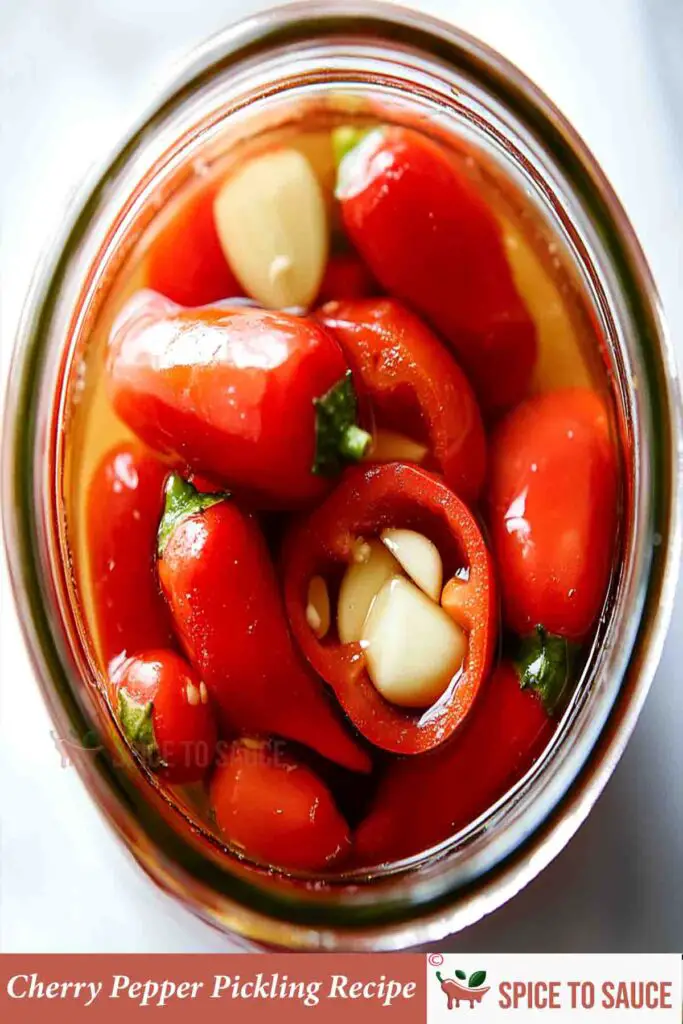
Cherry Pepper Pickling Recipe
Missing the cherry pepper pickling you tried in a salad bar? No worries! You can make it at home with our simple Cherry pepper pickling recipe. It’s extremely delicious with the freshness of cherry peppers and vinegar. It’s naturally sweet, spicy, tangy, and preservative-free.
Plus you’ll save dollars by making it at home instead of buying from stores. Make this sweet pickled cherry peppers once and enjoy it throughout the year. The recipe calls for simple ingredients with no pressure cooking required. Make pizza, burgers, sandwiches, and salad with homemade cherry pepper pickles. Tag along for bonus tips and the detailed recipe.
Ingredients Needed for Cherry Pepper Pickling:
DIY cherry pepper pickling is so delectable that it’s hard to resist. It’s spicy and vinegary with a sweet aftertaste. Once you try it, you’ll be a fan of it. Make pickled cherry peppers spicy or sweet depending on your tastebuds. You can keep the peppers whole or slice them into pieces before pickling.
I prefer keeping them whole as I like hot cherry pepper pickles. While halved or quartered cherry peppers will fit about twice as many in a jar. Again sliced cherry pepper pickle is easy to use in sandwiches and burgers. The point is the recipe is super flexible, choose the version that matches your requirements.
The ingredients are probably already available in your kitchen. Wondering what the ingredients could be? Let’s know the ingredients in detail.
Cherry Peppers:
Cherry peppers are bright red spicy peppers that come in a small round size. It has a unique crispy texture. These are best for making pickles. You’ll need around 1 pound of cherry peppers for this recipe. Use the produce from your own garden, or buy them directly from the farmers.
Garlic:
Garlic pairs very well with the spiciness of peppers. Use 10 garlic cloves, put 2 whole garlic cloves in each jar.
Bay Leaves:
Bay leaf is a nice addition to the pickle jars. It adds an earthy note to the taste of the tangy pepper preserves. Add one bay leaf to each jar. You’ll need 5 bay leaves.
Black Peppercorns:
Black peppercorns are bitter and pungent to taste. Use 1 teaspoon of black peppercorn in each pickle jar. You’ll need around 5 teaspoons of black peppercorns.
Mustard Seed:
Mustard seeds work with pepper and vinegar intensifying the flavors of our vinegar-preserved cherry peppers. Use 2 teaspoons of mustard seeds in the recipe.
Brine:
Brine is a water-vinegar-salt-sugar solution used for pickling. Use water and vinegar half-half with 2 teaspoons of salt to make the brine. You’ll need 2 cups of brine for the recipe.
Sugar:
Using sugar is totally optional. I like my cherry pepper pickling a little sweet. So I used 2 teaspoons of sugar in the recipe. Skip sugar if you want to make it sugar-free.
Allspice Berries:
Allspice berries are used in both sweet and savory recipes. These are sweet, and spicy, and complement the cherry peppers nicely. Use 10 allspice berries in the recipe.
Olive Oil:
Olive oil is a magical ingredient for pickling. It helps with the longevity of the pickle and also enhances the flavors. Use ½ cup olive oil, pour 1 tablespoon on top of each jar after putting all the other ingredients.
Step-by-Step Guide to Pickling Cherry Peppers:
Wondering why spending so much time on making something that you can easily buy from the store? Store-bought cherry pepper pickles contain a lot of sugar and are full of added preservatives. You can create a homemade version that is fresh, customized, and a good source of vitamins. Pickling at home will also save you a lot of money.
Canning peppers assures their longevity. These preserved fresh peppers are addictive with just a little sweetness. Need a quick pickling method for your cherry peppers? I used the boiling water method in this recipe which is relatively easy and time-saving. Tag along for step-by-step instructions.
Step 1:
Prepare a water bath, that is to boil water in a large pot. Sterilize all jars and lids in the water bath by boiling them for at least 10 minutes.
Pro Tip:
Go for jars with clamp latch lids. These are easy to pick up after sterilizing.
Step 2:
In a pot put vinegar, sugar, salt, and water. Bring it to a simmer. Your brine for pickling cherry peppers is ready. Apple cider vinegar is the best for pickling peppers, but you can also use white or red vinegar.
Step 3:
In this step, we’ll prepare the cherry peppers. Wash the peppers and trim any excess stems. Pierce each pepper with a knife so the brine will get well inside and the peppers will not burst.
Step 4:
Now go back to your hot and sterilized jars. Wipe out any remaining moisture from the jars. Pack the cherry peppers tightly into the jars. I used 5-pint jars in this recipe. In each jar, put 2 garlic cloves, ½ teaspoon mustard seeds, ½ teaspoon black peppercorns, 1 bay leaf, and 2 allspice berries.
Step 5:
Pour the hot brine mix into the jars as needed. Jostle the jars in the process to remove any air bubbles. Now put 1 tablespoon of olive oil in each jar.
Pro Tip:
To avoid any mess while pouring the brine, use a wide-mouth funnel.
Step 6:
Wipe the jars and attach the lids carefully. Process the jars in boiling water for 10 minutes. Your mouth-watering cherry pepper pickles are ready to serve. Put the jars at rest for 2-3 days for more intensified flavors.
Pro Tip:
Use a jar wrench and jar lifter to safely remove the jars from the boiling water.
Recipe Tips & Notes:
- To know in detail about the canning process follow guidelines of the National Centre for Food Preservation.
- Want to make sugar-free sweet and sour pickled peppers? Skip the use of sugar. In that case, the pickle will not taste very sweet. Only the natural sweetness from peppers will dominate.
- If you want to avoid the water bath method, it’s completely okay. Follow the recipe as it is, the cherry pepper pickling will remain fresh in the refrigerator for up to a month.
- Be patient to pierce each pepper, it’ll help the chili oils come out in the brine and the brine gets inside the peppers for easy pickling.
- To make the jars good-looking, try a mix of small and large peppers.
- Always leave ¼ inch of empty space in each jar.
Essential Kitchen Tools For Cherry Pepper Pickling Recipe:
Making our hot and sweet go-to cherry pepper pickles? Use the following recommended kitchen tools to make the recipe hassle-free.
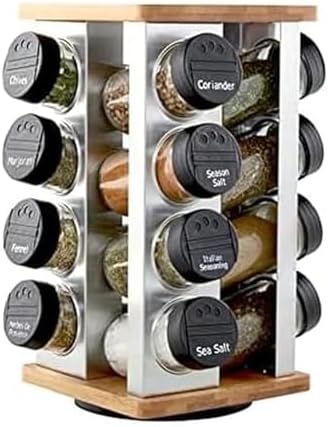
Glass Jars With Lids:
Airtight jars with lids are a must for homemade Cherry pepper pickling. Try jars with clamp latch lid for easy use. Go for the dishwasher-safe ones. You’ll need 5 large pint jars for the recipe.
Canning Kit:
Canning kits come with a set of handy canning tools. Such as a canning rack, jar wrench, ladle, canning jar funnel, measuring tool, cleaning brush, etc. Trust me, with a canning kit beginners will look like a pro
Nutritional Information:
| Nutrition Facts (per serving) | |||
| Calories | Fat | Carbs | Protein |
| 100 | 1.5g | 21 g | 5 g |

Cherry Pepper Pickling Recipe
Have abundant cherry peppers on hand? This is the easiest homemade Cherry pepper pickling recipe. Tag along, and soon this will be your go-to condiment.
Ingredients
Method
- Prepare a water bath and sterilize all jars and lids
- Make brine by mixing vinegar, sugar, salt, and water. Simmer for 10 minutes
- Wash and wipe peppers. Trim any excess stems.Pierce each pepper a couple of times with a knife
- Pack peppers in clean, dry jars. In each jar put 2 cloves of garlic, 2 allspice berries, a bay leaf, ½ tsp peppercorns, and ½ tsp mustard seed
- Pour the hot brine over the peppers. Wipe and seal the jars
- Process in a boiling water bath for 10 minutes
Final Thoughts:
Preserving fresh peppers is not a headache anymore, right? All you need is to buy some fresh peppers, and make brine. Our sweet and hot cherry pepper pickles are my go-to put-on-everything condiment. They add tons of flavor and amazing color to pizza, pasta, salads, and whatnot.
Enjoy as an appetizer or use as a condiment. Store pickle jars in a cool dry place for up to a year. Or gift it to your friends and neighbors. Make a batch today and thank me later!
Frequently Asked Questions:
Our Cherry pepper pickles are mildly spicy and a little sweet. Here are some questions that may cross your mind while making it.
1. How to Adjust the Spice Level in Pickled Cherry Peppers?
Removing the seeds and pith from the peppers can be an easy way to adjust spiciness. To make your easy pepper pickling real hot, add 1/2 tsp of red pepper flakes per pint.
2. How Long Do Pickled Cherry Peppers Last?
Make sure to sterilize the jars and lids properly, your cherry pepper pickle will last at least one year. No refrigeration is needed.
3. Can You Use Pickled Cherry Peppers in Recipes?
Serve cherry pepper pickles on snack boards with crackers and cheese. Make burgers, sandwiches, and salads with it. Use it as a pizza topping.